
Honorlock: Instructor Guide for ExamSoft Use
In order to use Honorlock for ExamSoft exams, you must will have to create an access point by creating a Brightspace Quiz. You will then utilize the Questions in the exam to guide students to ExamSoft.
Create ExamSoft Exam
Set up your ExamSoft exam as you normally would or follow the College of Nursing's Instructions on creating and posting an exam in ExamSoft. Be sure to review the specific setting listed below that are required in ExamSoft to properly functionality with Honorlock.
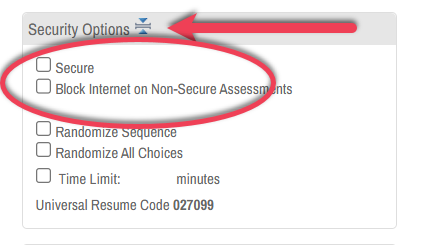
Specific Setting Configuration in ExamSoft
- Under Security Options, de-select Secure and de-select Block Internet on Non-Secure Assessments.
Note
Honorlock will not be able to monitor students if the security features provided in ExamSoft are enabled.
- Create an Assessment Password. It is recommended to select Create my own password and enter your desired password in the text box provided.
Note
You will need to copy the password entered in ExamSoft into the Brightspace Quiz, therefore, it is important to remember it or write it down before you post the assessment.

Brightspace Quiz Set Up
In order to use Honorlock to proctor an ExamSoft exam, you must create an access point for student with a Brightspace Quiz. When using Brightspace Quizzes to administer exams in Honorlock, it's essential that the exam settings meet specific criteria in Brightspace.
Exam Settings Must Contain:
- Start Date and Time (Copy the date and time in ExamSoft)
- End Date and Time (Copy the date and time in ExamSoft)
- Timing Limit
- It is recommended to NOT set the timing limit in Brightspace since timing will actually be kept in ExamSoft.
- Make Exam Visible
Below you will find detailed steps for configuring your exam settings.
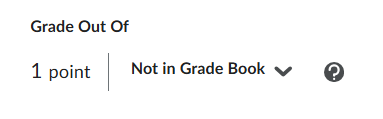
Step 1
It is recommended that the Grade out Of be set to Not in Grade Book. Since this will be just an access point and all grading done in ExamSoft it is better to not have it linked.
Step 2
Under Availability Dates & Conditions, select the drop down menu. Enter Start Date and Time and End Date and Time.
Remember exams must be available for a minimum of 48 hours.

Step 2a
The Password field in the Brightspace quiz settings is for Honorlock use only. This is not where you are sharing the ExamSoft password.
Note
Once the exam is enabled in Honorlock, an automatically generated password will be placed in the Availability Dates & Conditions section in Brightspace. This password should never be altered or shared with students.
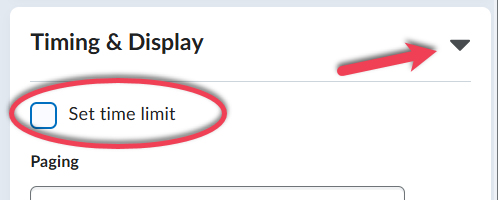
Step 3
Under Timing & Display, select the drop down menu. Leave the Set time limit unselected. Remember the exam duration will be entered in ExamSoft.
Step 4
Select the visibility toggle, to change exam from hidden to visible.

Question Section
In order to guide students to Examplify after they've launched the Brightspace Quiz, you will utilize the question section to provide information.
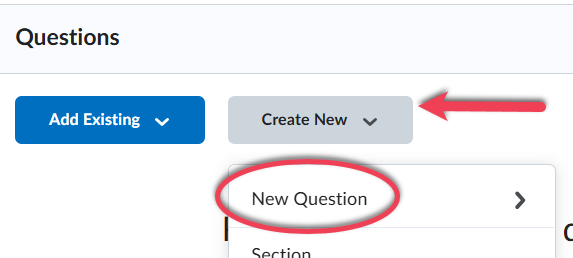
Step 1
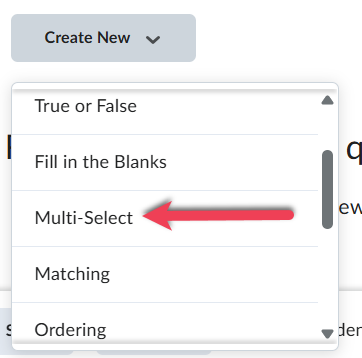
Under Questions select Create New and the New Question.
Step 1a
From the type of questions select Multi-Select.
Step 2
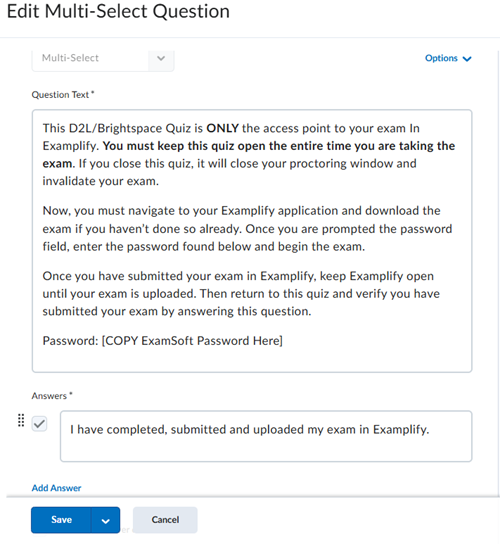
Select the text box and use this space to inform students of the process. Below is an example of our recommendation.
Example of Brightspace Quiz Question
This D2L/Brightspace Quiz is ONLY the access point to your exam In Examplify. You must keep this quiz open the entire time you are taking the exam. If you close this quiz, it will close your proctoring window and invalidate your exam.
Now, you must navigate to your Examplify application and download the exam if you haven’t done so already. Once you are prompted the password field, enter the password found below and begin the exam.
Once you have submitted your exam in Examplify, keep Examplify open until your exam is uploaded. Then return to this quiz and verify you have submitted your exam by answering this question.
Password: [COPY ExamSoft Password Here]
Step 3
Under answers, we recommend deleting all but one option that students must select before submitting the Brightspace Quiz. Below is an example of our recommendation.
Example of Brightspace Quiz Answer
I have completed, submitted and uploaded my exam in Examplify.
Access Honorlock
All users must access Honorlock from the link in the Brightspace course. The Honorlock link is usually found under UA Tools in the course's Navbar. If you do not see the link, view Insert Honorlock to Navbar.
Step 1
From the course's Navbar, select UA Tools then select Honorlock.

Enable Exams in Honorlock
If you are using Brightspace Quizzes to administer exams, ensure the exam meets the necessary criteria in Brightspace for it to appear in Honorlock. View Brightspace Quiz Set Up for criteria. Once you have created exams in Brightspace, they will all appear on your Honorlock dashboard. In order to turn on proctoring for the exams, Honorlock needs to be enabled for each.
If you are using a third party exam administrator, view Instructor Guide for Third Party Exams.
If you are administering exams in PDF form, view Utilize Brightspace Quizzes for PDF Exams.
Step 1
On your Honorlock dashboard, all course exams will appear. Select the Enable button to proceed with configuring exam settings.

Step 2
If you would like receive periodic emails regarding the exam results, under Email Notifications select the toggle to enable this feature.

Step 2a
On the box provided, enter the email of the individual that will receive this notifications in the box provided and select add. If multiple individuals need to be added, each email has to be entered and added separately.

Step 3
Within the Proctoring Settings section, choose the appropriate options to customize the exam experience. Select an option to enable or disable.
Note
For ExamSoft exams neither BrowserGuard or Allowed URLs can be enabled. They interfere with students ability to open Examplify.
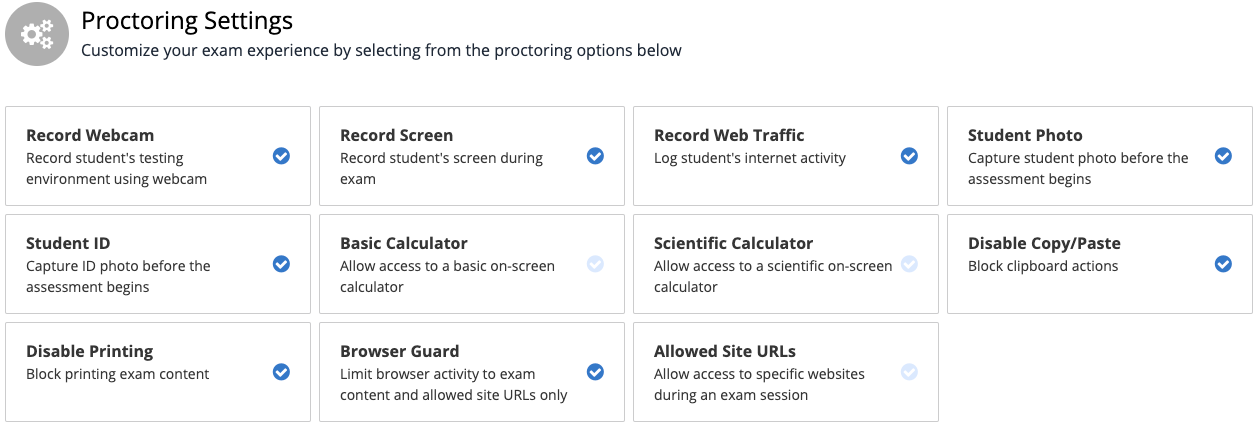
Proctor Settings Available
- Record Webcam: Records HD video of the exam taker's face and testing environment using their built-in webcam or external webcam. (Enabled by default)
- Record Screen: Records HD video of the exam taker's laptop or desktop screen.
- Record Web Traffic: Logs and monitors the browser activity in Google Chrome during the exam. (Enabled by default)
- Student Photo: Requires the exam taker to take a still picture prior to taking their exam. (Enabled by default)
- Student ID: Requires the exam taker to take a picture of their government-issued photo ID or CatCard with their webcam. Honorlock will ensure the name on the ID matches the name in D2L. (Enabled by default)
- Calculator: Allows a built-in online basic or scientific calculator (opens in a new tab) during the exam.
- Browser Guard: prevents access to additional applications outside of Google Chrome. Any attempt to access external applications will generate an automated flag. (Enabled by default)
- Disable Copy Paste: Prevents copying exam content and pasting it outside of the exam. This setting is also linked to any right click properties. (Enabled by default)
- Disable Printing: Prevents access to the browser print function to print or export exam content. (Enabled by default)
- Allowed Site URLs: Grants access to another Chrome tab to any sites added. It includes links to e-textbook, DESMOS for an online graphing calculator, or a link to any other web pages needed to complete the exam.
Step 4
Within the Student Guidelines section, choose the appropriate option to define what students can or can't do. The options are disabled by default. Select an option to enable or disable. To write course specific instructions, select + Show Additional Instructions.
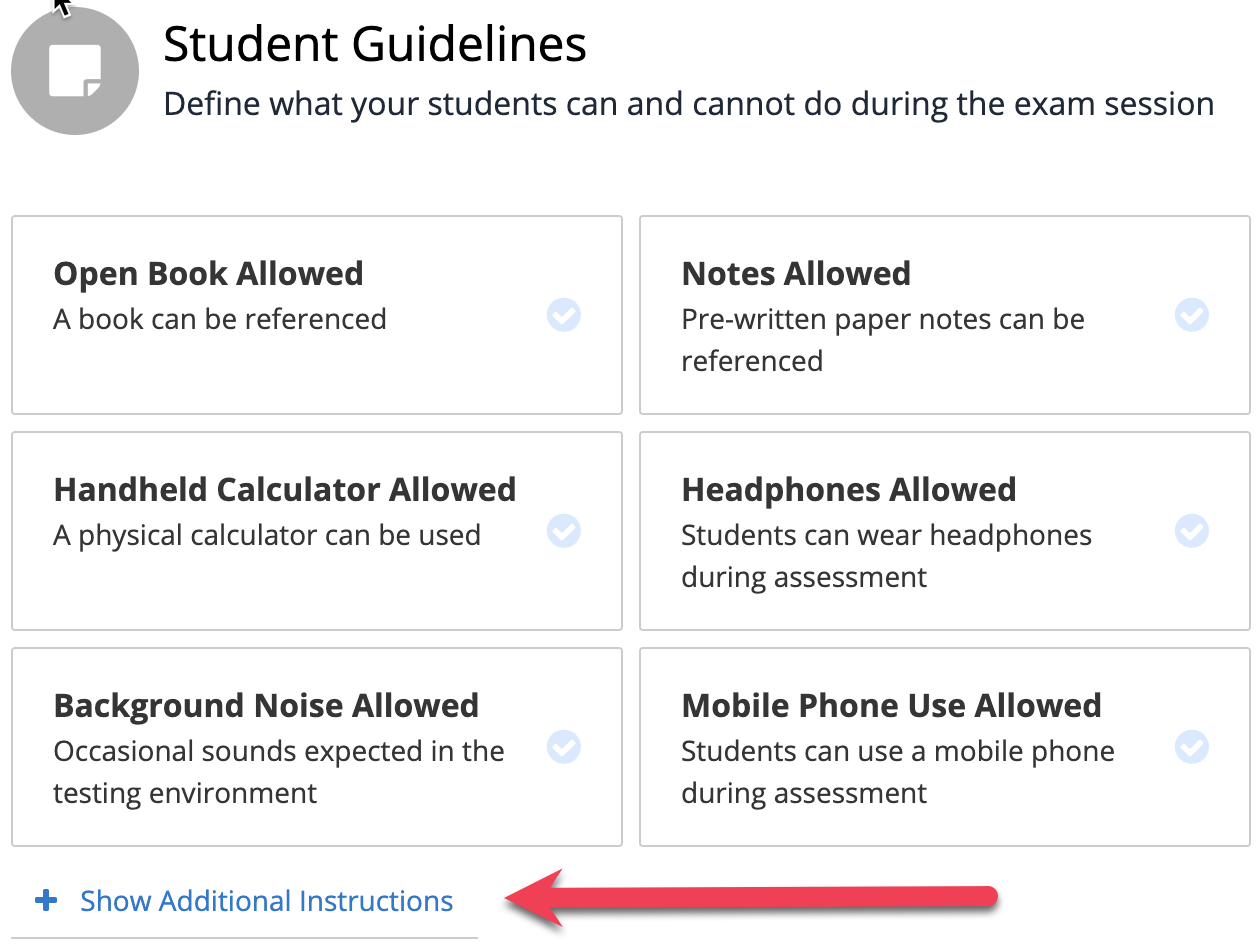
Student Guidelines Available
- Open Book Allowed
- Notes Allowed
- Scratch Paper Allowed
- Restroom Breaks Allowed
- Handheld Calculator Allowed
- Headphones Allowed
- Hats Allowed
- Take Exam in Public Area
- Background Noise Allowed
- Mobile Phone Use Allowed
Step 5
Select the text box to write Additional Instructions. Use Additional Instructions to clarify or expand on Student Guidelines, or add course-specific instructions.
Student Guidelines and Additional Instructions will be visible to both test takers and proctors.
Note
Under Additional Instructions you must mention that students will be using the application Examplify in order to test. This is to prevent students from being interrupted for having the application open.

Step 6
Select the text box, type the student first and last name and then state the Accommodation detail, when applicable.
This section will only be visible to proctors.

Step 7
Select the Exam Visibility menu and choose between the options.
- No, use the dates on the exam to determine student view.
- Yes, always show the exam in the student view.
Regardless of the choice, students will not have access to the exam content prior to the testing window.

Step 8
Once all settings are selected, select the Enable button.