
Examity: Create Third Party Exams
This guide is for instructors using a testing platform other than D2L.
Access Examity
All users must access Examity from the link in their D2L course. The Examity link is usually found under UA Tools in the course's Navbar. If you do not see the link, view Add Examity to D2L Course Navbar.
Step 1
From the course's Navbar, select UA Tools then select Examity v5.

Create Exam
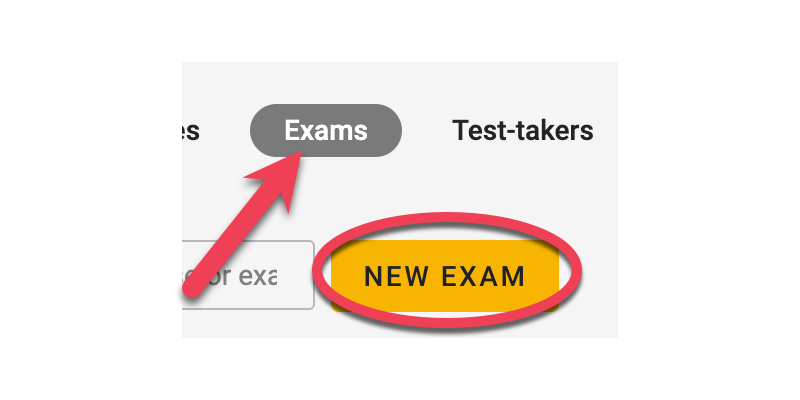
Step 1
In Examity select Exams then select New Exam.
Step 2
From the drop-down menu, select your course name.
Step 2a
Enter the exam details to match the third party platform details.
- Exam Name
- Start date and time
- End date and time
- Exam Duration
Step 2b
Once all items are filled, select Next.
Step 3
Select the security level in accordance with university guidelines.
Step 3a
Enter and select the additional exam details.
- Link to test: To enable the start button after student authentication, a link must be entered. Please provide the URL to the third-party platform or the location where students can access it.
- Exam Password: Only enter a password if it will be required for the third party platform and it must match exactly.
- Allow Test-taker to upload file: Yes or No option.
- Show Proctored Status in Gradebook: Yes or No option.
- Enable Extension Block List: Yes or No option.
Step 3b
Once the additional exam details are entered, select Next.
Step 4
Configure student guidelines by selecting Additional Rules and entering Special Instructions that apply to your exam. Upload Supporting Document(s) if applicable.
Step 4a
Once all student guidelines have been configured, select Create Exam.