
Quiz Question Options
On This Page
Create Multiple Questions Referring to an Image, Text, Video or Equation
Allow Students to Use Recorded Answers, Links, Equations
Add Hints to Individual Questions
Add Feedback to Individual Questions
Draw Randomly from a Question Pool
Randomize Some Questions but not Others
Learn about Regular Expressions for Auto-grading Questions
Use RegEx101.com to Test Your Expressions
Add Sections to Quizzes
Step 1
Select Quizzes in the course navbar.
Step 2
Select the name of the quiz you would like to edit.
Step 3
Under the Questions heading, select Create New and choose Section from the menu.
Step 4
Give the section a Title.
Note
By default, the title is visible to students. To change that, select the Hide Section Title from students option.
Step 5
(Optional) Add a set of instructions in the Section Text field.
Note
By default, these instructions are visible to students. If you want the instructions to be visible to the instructional team only, select Hide Section Text from students.
Step 6
Select Shuffle questions in this section if you want to randomize the order of the questions within the section.
Step 7
Select the Save button.
Step 8a
(Optional) import questions from the Question Library into your quiz.
Step 8b
Select the checkbox next to the questions you would like to move and select the Move button to place them in the appropriate section. Alternatively, use the drag handle to drag and drop questions into the appropriate section.
Move Quiz Questions
Step 1
Select the Actions Menu icon next to the quiz name and select Edit.
Step 2
Select the checkbox next to the question(s) you want to move.
Step 3a
Select the Move To button that appears. Choose either Top of the Quiz, Bottom of the Quiz, or Section.

Step 3b
Alternatively, after selecting the question(s) or section(s) you want to move, hover your cursor over the eight-dot icon to drag and drop questions to their desired location.

Create Bonus Questions
Note
Randomly drawn questions from a Question Pool cannot be bonus.
Step 1
Select Quizzes from the navbar.
Step 2
Select the quiz name.
Step 3
Select the checkboxes corresponding to the bonus question(s) in your quiz.
Step 4
Select the More Actions button and choose the Toggle Bonus button from the menu.
Note
You must designate specific questions to be bonus questions.
Step 5
Select the Save button to remain in the quiz (or Save and Close to save your changes and exit the quiz).
If your goal is to have the Bonus question replace a missed question in the quiz (in other words, the highest score a student can earn is 100%), then you are finished. If students can earn higher than 100%, proceed.
Step 6
Select Grades in your course navbar.
Step 7
Make sure you are in the Manage Grades view.
Step 8
Select the grade item to edit it.
Step 9
Select Can Exceed.

Step 10
Select Save and Close.
In the gradebook (if your grade item is nested under a category): if you want any bonus points to replace missed points in that category (in other words, if the max score students can earn for that category is 100%), you are finished. If you want students who earn higher than 100% in that category to bump up their final grade, then proceed:
Step 11
Select the category.
Step 12
If you have a points grade book, check the box for Can Exceed.
If you have a weighted grade book, check the box for Allow category grade to exceed category weight.
Step 13
Select Save and Close.
Create Multiple Questions Referring to an Image, Text, Video or Equation
Step 1
Select Quizzes from the course navbar.
Step 2
Select the Question Library tab.
Note
You can also use the Create New button within an individual quiz, but our recommended workflow is to create questions in the Question Library so you can use them for multiple courses.
Step 3
Select the New button and select Section from the menu.
Step 4
Type in a Section Title that will help you to identify the questions stored inside this section.
Note
By default, the title is visible to students. To change that, select the Hide Section Text from Students option.
Step 5
- To refer to an image: In the Section Text box, select the Insert Other Options button and the Insert Image button. Follow the help page instructions for adding and formatting an image.

- To refer to an item of text: Add your text to the Section Text field; follow the instructions in our help page: Format Text With the HTML Editor to ensure it is accessible.
- To refer to a video: In the Section Text toolbar, select the Insert Other Options button and the Insert Stuff button.
-

To refer to an equation: Follow instructions for adding scientific and mathematical expressions using the HTML editor.

-
Step 6
Select Shuffle questions in this section if you want to randomize the order of the questions.
-
Step 7
Select Save.
Step 8
Select the Section folder to open it.
-
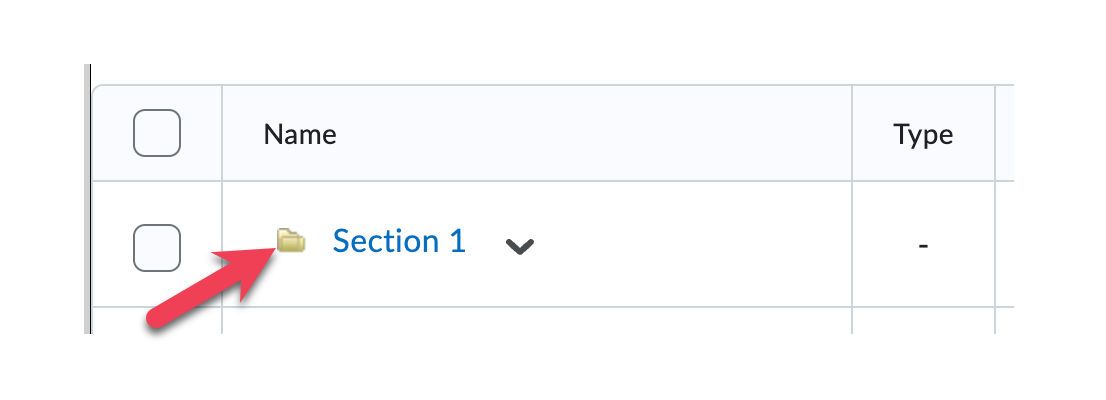
Step 9
[NEW LINK: Create your questions] related to the item being referenced inside this folder.
Step 10
When you are finished, select Done Editing Questions.
Step 11
Select your quiz to open it.
Step 12
[NEW LINK: Import the section] from the Question Library.
Note
Make sure you check both the section (so the image displays) and the questions.

Allow Students to Use Recorded Answers, Links, Equations
Note
The option is only available with the Written Response question type.
Step 1
Select Quizzes from the course navbar.
Step 2
Select the Question Library tab.
Note
You can also use the Create New button within an individual quiz, but our recommended workflow is to create questions in the Question Library so you can use them for multiple courses.
Step 3
Select the name of any Section folder to open it.
Step 4
Follow these instructions for creating a Written Response question [link to current Help Page].

Step 5
Select Enable HTML Editor for student responses.
Note
Students cannot upload images into a quiz question. If they select the Insert Image icon, they are directed to enter a URL (web address).
Step 6
To enable students to add media, select the checkbox for Allow learners to insert images and add attachments.
Step 7
Select the Save button.
Add Hints to Individual Questions
Step 1
While editing a quiz, select the Timing & Display section to expand the options.
Step 2
Check the box next to Allow hints. Select Save and Close.
Step 3
Select the question either in the quiz or in the Question Library.
Step 4a
For True/False, Multiple Choice, Multi-Select, Written Response, and Short Answer question types, select the Options link and select Add Hint.

Step 4b
For all other question types, scroll down past the answers to locate the Question Hint.

Step 5
Enter your hint in the Hint field.
Step 6
Select the Save button to save your question and return to editing the quiz.
Add Overall Feedback
Step 1
Open the Actions Menu icon for the quiz (use the down-caret next to the quiz name) and select Grade.
Step 2
Select the student's attempt.
Step 3
Change the Attempt to Completion Summary.
Step 4
Add your feedback to the Overall Feedback field.
Note
The Overall Feedback includes the full HTML Editor when you select the +v icon.

Step 5
Select Save.
Step 6
Change the attempt back from the Completion Summary to the Attempt number.
Step 7
Select Publish (or Update if you have already published).
Add Feedback to Individual Questions
Note
You must edit the primary quiz results view to allow students to see questions. Students will only see feedback for questions you release to them.
Step 1
Select the question.
Step 2
For True/False, Multiple Choice, Multi-Select, Written Response, and Short Answer question types, select the Options link and select Add Feedback. For all other question types, located the Feedback below the Answers and the Hints.
Step 3
Add your feedback to the Overall Feedback field.
Step 4
Select the Save button to save your question.
Add Feedback to Answers
Note
You must edit the primary quiz results view to allow students to see questions. Students will only see feedback for questions you release to them.
Step 1
Select the question to edit.
Step 2
For True/False, Multiple Choice, Multi-Select, Written Response, and Short Answer question types,
select the Options link and select Add Feedback. For all other question types, located the Feedback below the Answers and the Hints.
Step 3
Use the Add feedback for this answer fields.
Step 4
Select the Save button to save your question.
Randomize Answer Choices
Step 1
Select Quizzes in the course navbar.
Step 2
Select the Question Library tab.
Note
You can also edit the question from within an individual quiz, but our recommended workflow is to create questions in the Question Library so you can use them for multiple courses.
Step 3
Select the name of the question you want to edit.
Step 4
Select the Randomize answer order checkbox.
Step 5
Select the Save button to remain on this page (or Save and Close to save your changes and exit the quiz).
Draw Randomly from a Question Pool
Note
You can only create pools from questions that are located in the quiz Question Library.
Step 1
Select Quizzes in the course navbar.
Step 2
Select the name of your quiz.
Step 3
Select the Create New button and choose Question Pool.
Step 4
Give your Question Pool a Title (this is equivalent to creating a section within your Quiz, although students do not see the title).
Step 5
Enter the number of questions you want D2L to draw in the Number of Questions to Select field randomly.
Step 6
Enter the points each question will be worth in the Points per Question field.
Step 7
Select the Browse Question Library button.
Step 8
Place checkmarks next to the questions you want to include in the pool. D2L will select from these questions.
Note
Questions can come from different sections in your Question Library. You may have to select the triangle to the left of the section name to see the nested questions
Step 9
Select the Import button.
Step 10
Select the Save button.
Step 11
Repeat this process if you wish to have multiple pools in your quiz, with each pool drawing from a random set of questions.
Step 12
Select the Save button to remain in this tab (or Save and Close to save your changes and exit the quiz).
Note
If a question pool is set erroneously with fewer questions available than it is supposed to pull from, then a warning is placed in the following three places:
- On the Manage Quizzes page.
- In the Edit Quiz page.
- In the grading evaluation experience.
Most likely you will just see the following error message when you try to do it:

In fact, Brightspace will generally not allow you to save a question with this error:

Randomize Some Questions but not Others
Step 1
Select Quizzes in the course navbar.
Step 2
Follow the instructions to create a section in your quiz. Be sure to select the Shuffle questions in this section option.
Step 3
Select the section folder to open it.
Step 4
Import your questions from the Question Library or begin adding questions within this Section in the quiz.
Step 5
Select the Save button to remain in this tab (or Save and Close to save your changes and exit the quiz).
Learn about Regular Expressions for Auto-grading Questions
Note
If you are using a screen reader make sure that punctuation reading settings are set to read for voice symbols that are found in these sections on Regular Expressions.
Step 1
Regular Expressions (RegEx) are algorithms that can machine-grade short answer, fill-in-the-blank, arithmetic, and significant figures questions.
Step 2
Review commands:
Example 1: Case Insensitive Command (?i)
Question: Natural carmine dye is made from the _____ insect.
RegEx: (?i)cochineal
Accepted answer/s: Cochineal, cochineal, CoChInEaL
Example 2: Either Or Command | (Pipe)
Question: What sound does a cat make?
RegEx: Meow|Purr|Hiss
Accepted answer/s: Meow, Purr, or Hiss
Example 3: Replace any literal character. (Period)
Question: What three-letter "spooky" animal is associated with Halloween?
RegEx: .at
Accepted answer/s: Bat, Cat, or Rat
Example 4: Define the Beginning and End of a Pattern ^ (Caret) and $ (Dollar)
Question: Magnetic resonance imaging is abbreviated as ______.
RegEx: ^MRI$
Accepted answer: MRI - only "MRI" with no additional characters or spaces would be scored correctly.
Note
RegEx commands will match any portion of a pattern unless specified with anchor commands like ^ (Caret) and $ (Dollar). For example, yes matches any answer with the word "yes" in it, e.g., yes, yes please, and my answer is yes. Again, use anchors to limit matches.
Common Regular Expressions
| Character | Name | Description | Example |
|---|---|---|---|
| * | Asterisk | Matches the preceding character zero or more times. | cat* matches ca, cat, or catttt |
| \ | Backslash | Marks a metacharacter as literal. | c\.t matches c.t but not cat |
| ^ | Caret | Starts the input string or pattern. | ^cat matches cat, catnip, but not tomcat |
| $ | Dollar | Ends the input string or pattern. | cat$ matches cat, tomcat, but not catnip. ^cat$ matches only cat |
| (?i) | NA | Makes the pattern case insensitive. | (?i)cat matches CAT, cat, or CaT |
| ( ) | Parentheses | Creates a subexpression. | wild(cat)* matches wild or wildcat |
| . | Period | Matches any literal character. | .at matches cat, bat, or rat |
| | | Pipe | Matches either or. | cat|dog matches cat or dog. |
Step 3
For more information review Brightspace Documentation: Understanding Regular Expressions.
Use RegEx101.com to test your expressions
Navigate to the free website regex101.com if you are looking to test the expressions that will best cover the answers you intend.
Note
To get the most accurate regular expression codes for the Brightspace interface, make sure to set the Flavor on the home page to the available .NET (C#) version.
Plug in an expression that you anticipate will work, then check the matches by typing words below.

Alter the expression to see how that alters the matches.
Note
You can additionally test expressions at the open source website regexr.com.
Important
When using regular expressions, you should always plan to preview your quizzes to test that they are working in Brightspace the way you want them to work.
Insert Regular Expressions into D2L Quiz Questions
Step 1
Follow instructions to [NEW LINK: Create Open-Ended Questions] or access an already existing question in Edit mode.
Step 2
Locate the answer text field.
Step 3
Type the RegEx into the answer text field. If you generated the RegEx from the RegEx Generator Tool, paste the RegEx into the answer text field.
Step 4
For short answer questions, select the Actions Menu icon to the left of the answer text field, then choose Regular Expression. For fill-in-the-blank questions, select the Regular Expression option from the Evaluation column.
Note
You must indicate that the supplied answer is a Regular Expression. If you do not complete Step 4, Brightspace will treat the code as the literal, correct answer. Be sure that Regular Expression is selected.
Step 5
Select Save.
Use RegEx to Give Full Points to Any Answer
Step 1
In a quiz you are building or editing, under Questions, click Create New and select New Question.
Step 2
Choose either Fill in the Blanks or Short Answer. These are two open-ended and auto-graded question types, thus fulfilling the qualifications for this formula to work.
Step 3
In the Answer field, place the following formula in bold (in bold on this page merely to highlight which characters are needed): .*
Step 4a
For a Fill-in-the-Blank question - in the Evaluation field, select Regular Expression.
Step 4b
For a Short Answer question - make sure that Regular Expression is selected in the field to the left of the Answer blank. It will look like [^ab] when selected, but it will read Regular Expression on the actions menu from which you select it.
![Short Answer shows [^ab] in the Answers field preceding the expression.](http://d33v4339jhl8k0.cloudfront.net/docs/assets/6272dbe508b964770b2f5df8/images/68d5ca5f7f163d20b310a7c3/file-4SBNnt8roI.png)
Step 5
Save and Close. As long as a student types one character into the text box, it will get auto-graded as correct. If you wish to set more parameters, see the other Regular Expression sections of this help page, and feel free to contact the InTech team for further assistance.