
Honorlock: Instructor Guide
On this page:
Access Honorlock
All users must access Honorlock from the link in the Brightspace course. The Honorlock link is usually found under UA Tools in the course's Navbar. If you do not see the link, view Insert Honorlock to Navbar.
Step 1
From the course's Navbar, select UA Tools then select Honorlock.

Enable Exams in Honorlock
If you are using Brightspace Quizzes to administer exams, ensure the exam meets the necessary criteria in Brightspace for it to appear in Honorlock. View Brightspace Quiz Set Up for criteria. Once you have created exams in Brightspace, they will all appear on your Honorlock dashboard. In order to turn on proctoring for the exams, Honorlock needs to be enabled for each.
If you are using a third party exam administrator, view Instructor Guide for Third Party Exams.
If you are administering exams in PDF form, view Utilize Brightspace Quizzes for PDF Exams.
Step 1
On your Honorlock dashboard, all course exams will appear. Select the Enable button to proceed with configuring exam settings.

Step 2
Email Notifications are automatically enabled and locked on. The primary instructor will automatically receive emails regarding the exam sessions. If you'd like to disable notification follow Step 2b.
Step 2a
Under Add Email Address to Receive Notification you may enter email addresses of any other individual that should also be receiving these email notification. Select the text box, type the email address, and select Add.

Step 2b
To avoid receiving notification, you may remove your email address from the list. Under Email Addressed Receiving Notification, select the box adjacent to your email address and select Remove Email Address.

Step 3
Within the Proctoring Settings section, you may select any tile to enable or disable a feature. The blue checkmark will indicate the feature is enabled.

Proctor Settings Available
- Record Webcam (Enabled by default): Records HD video of the exam taker's face and testing environment using their built-in webcam or external webcam.
- Use Side-Angle Requirement: Requires student to use an external webcam to capture a winder view of their testing space.
Note
Visit Setting Up A Side-Angle Camera (opens in a new tab) to learn more.
If you are interested in enabling the side angle camera, contact InTech for assistance.
- Record Screen (Enabled by default): Records HD video of the exam taker's laptop or desktop screen.
- Record Web Traffic (Enabled by default): Logs and monitors the browser activity in Google Chrome during the exam.
- Student Photo (Enabled by default): Requires the exam taker to take a still picture prior to taking their exam.
- Student ID (Enabled by default): Requires the exam taker to take a picture of their government-issued photo ID or CatCard with their webcam. Honorlock will ensure the name on the ID matches the name in D2L.
- Calculator: Allows a built-in online basic or scientific calculator (opens in a new tab) during the exam.
- Browser Guard (Enabled by default): prevents access to additional applications outside of Google Chrome. Any attempt to access external applications will generate an automated flag.
- Disable Copy Paste (Enabled by default): Prevents copying exam content and pasting it outside of the exam. This setting is also linked to any right click properties.
- Disable Printing (Enabled by default): Prevents access to the browser print function to print or export exam content.
- Allowed Site URLs: Grants access to another Chrome tab to any sites added. It includes links to e-textbook, DESMOS for an online graphing calculator, or a link to any other web pages needed to complete the exam.
Step 4
Within the Student Guidelines section, choose the appropriate option to define what students can or can't do during an exam. The options are disabled by default. Select an option to enable or disable.
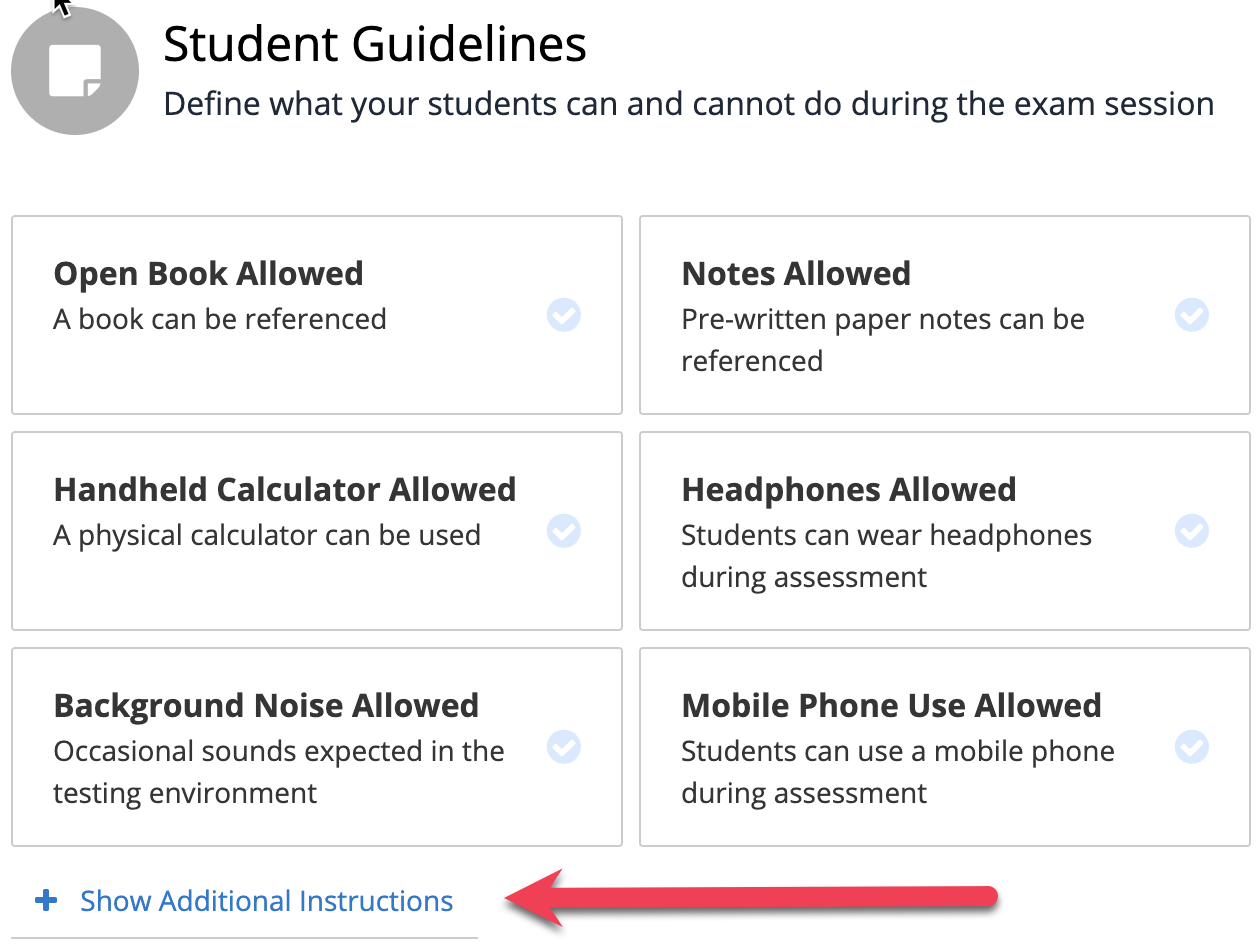
Student Guidelines Available
- Open Book Allowed
- Notes Allowed
- Scratch Paper Allowed
- Restroom Breaks Allowed
- Handheld Calculator Allowed
- Headphones Allowed
- Hats Allowed
- Take Exam in Public Area
- Background Noise Allowed
- Mobile Phone Use Allowed
Step 5
To write course specific instructions, select + Show Additional Instructions. Select the text box to write Additional Instructions. Use Additional Instructions to clarify or expand on Student Guidelines, or add course-specific instructions.
Note
Student Guidelines and Additional Instructions will be visible to both test takers and proctors.

Step 6
Select the text box, type the student first and last name and then state the Accommodation detail if any.
Note
Accommodations are only visible to proctors.

Step 7
Select the Exam Visibility menu and choose between the options.
- No, use the dates on the exam to determine student view.
- Yes, always show the exam in the student view.
Regardless of the choice, students will not have access to the exam content prior to the testing window.

Step 8
Once all settings are selected, select the Enable button.